By Brad Vaillancourt and Dan Durston
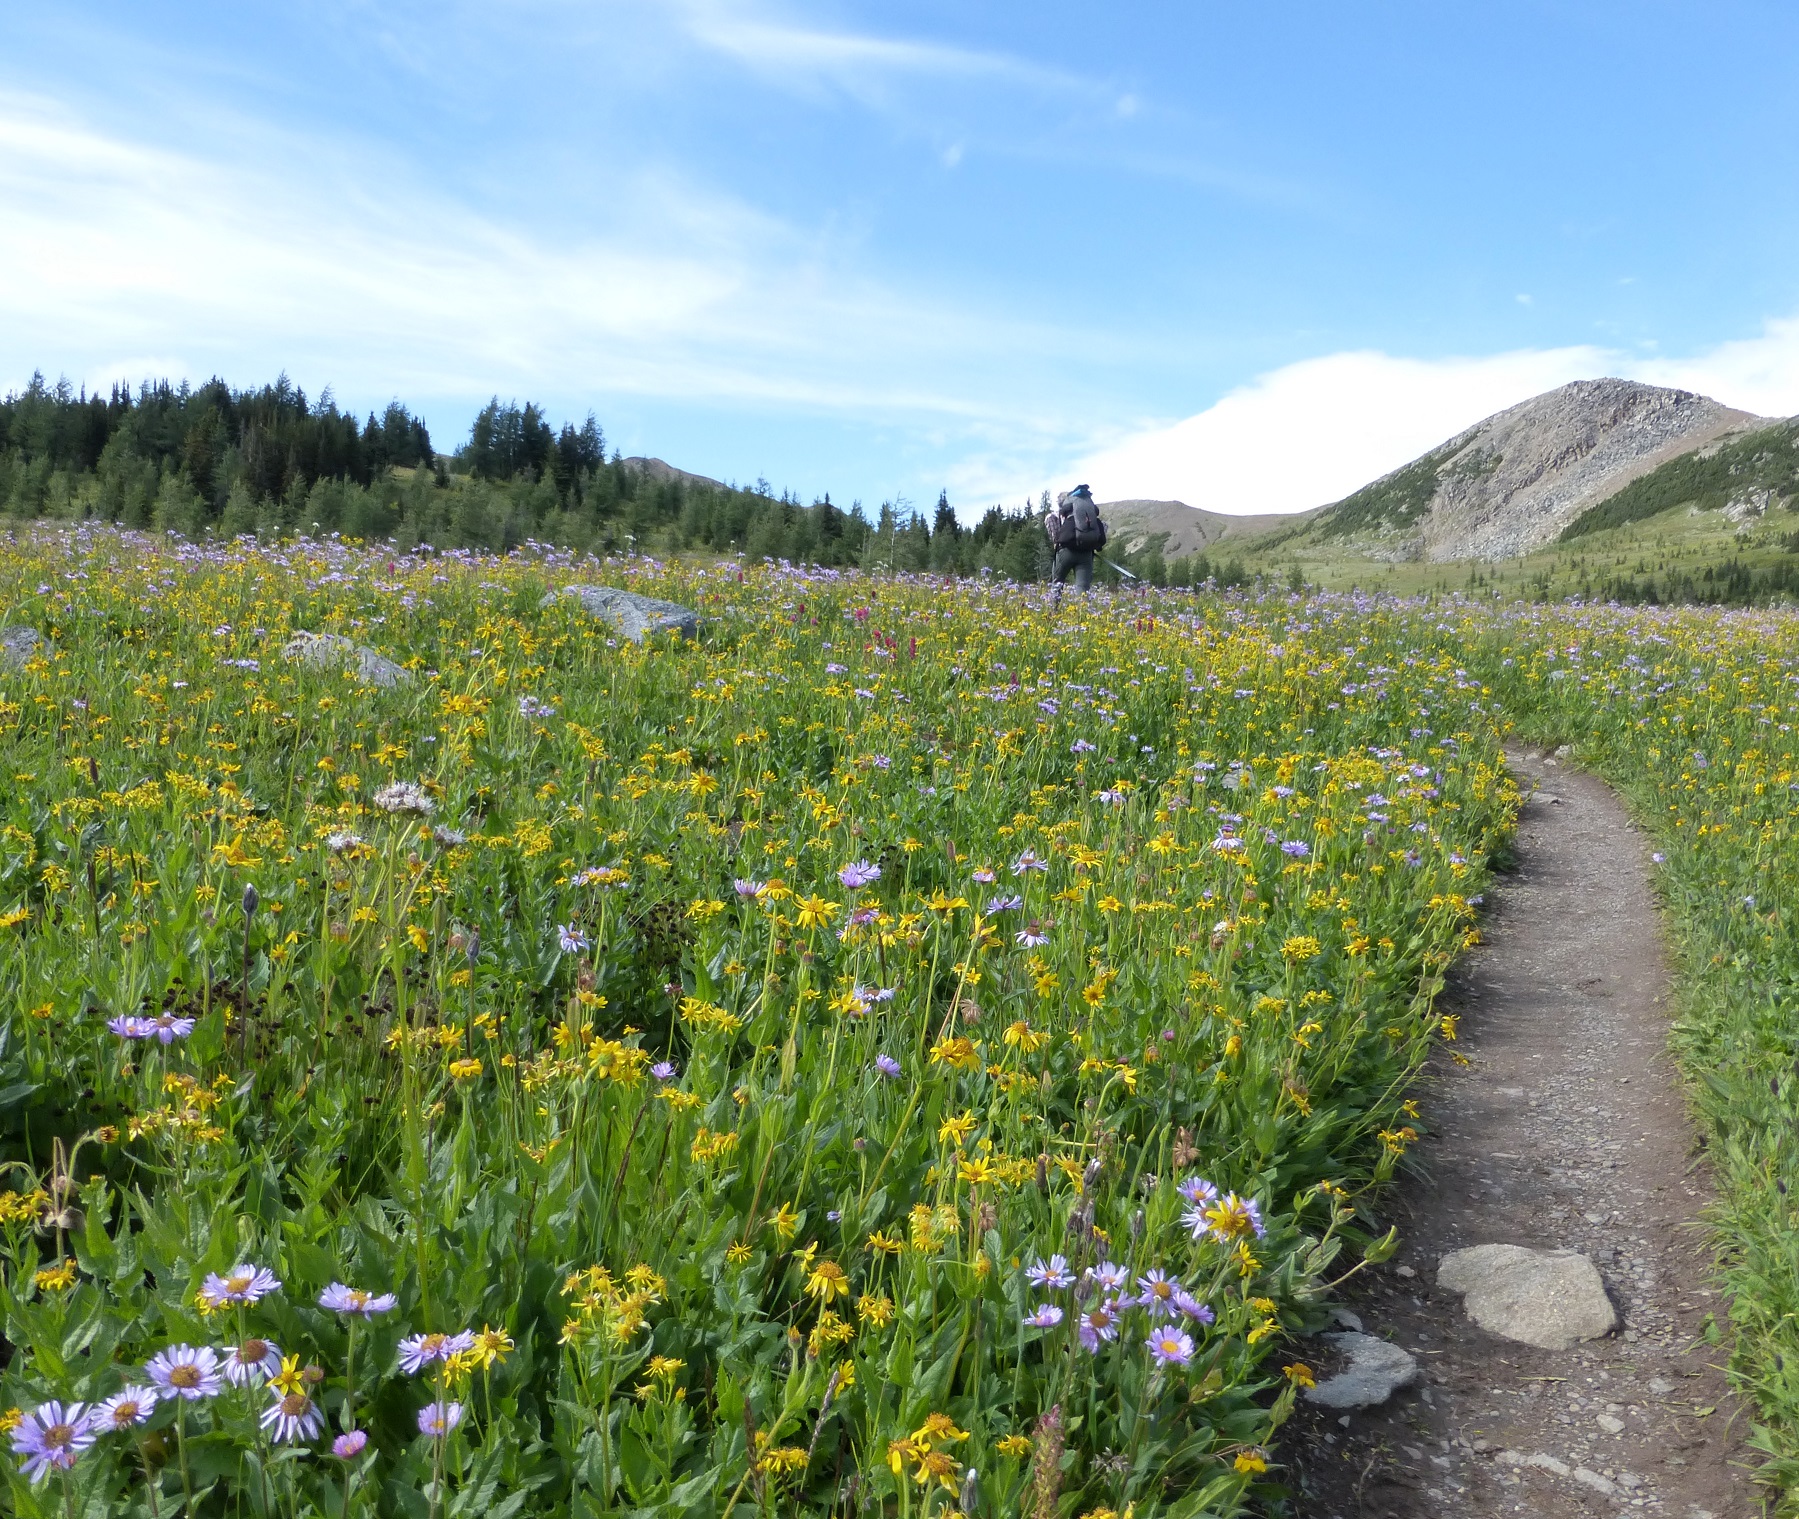
Every family has its black sheep and the GDT is no different. Section D – Field to the Crossing – has an infamous and long-standing reputation of being the worst section of the GDT, demanding blood, sweat and tears from thru-hikers while providing very little reward in return. Section D offers the experience of overgrown trail that hasn’t been maintained in decades; hundreds of deadfall and blowdown trees creating a jungle gym of obstacles for hikers to navigate; and fast flowing glacial fed creeks that must be forded, so powerful they have washed away all attempts to build bridges across them. But that is all about to change.
This year, Section D has undergone a “facelift” with the re-routing of the main route onto the Howse Floodplain, the restoration of the David Thompson Heritage Trail and the introduction of the new Kiwetinok Alternate. While Section D will always be a remote and wild section of the GDT, requiring some route-finding, challenging creek fords, and increased physical and mental effort, GDT hikers can now look forward to more rewards for their efforts and a significantly improved hiking experience in 2019.
The new Howse Floodplain route follows the Conway Creek and Howse River floodplains wherever possible, avoiding crossing the main channel of the Howse River. The floodplain is wide and exceptionally scenic, offering a route quite similar to that of the original explorers to Howse Pass centuries ago. There are several shallow fords of smaller channels on the floodplain so hikers must be prepared to have wet feet while enjoying a significantly better hiking experience than the old overgrown trail strewn with literally hundreds of fallen trees. In June and early July, the Howse River may be in flood making some sections of the floodplain difficult or impassable in which case hikers should consider using the old trail (now marked as an alternate route). Conversely, in late August and September when the river is low, hikers may be able to ford the main river channel and completely avoid any bushwhacking along the river’s edge. See below for a more detailed route description.
Last summer work began to restore the David Thompson Heritage Trail, including clearing brush, removing deadfall, building tread around washed out sections, and constructing a new log bridge over Lambe Creek. Our goal was to keep any new trail constructed as close as practicable to the location of the original, and to maintain the character and “feel” of the original historic trail to the greatest extent possible. GDTA volunteers agreed that it was immensely satisfying to experience the results of their work first-hand, not only from the perspective of hikers who would no longer have to laboriously route-find their way through the valley, but also in the knowledge that this nationally significant trail was now restored (at least partially) to its historic glory. We will be returning to the David Thompson Heritage Trail this summer to complete the restoration of the final 5 km to Howse Pass.
The Kiwetinok Alternate allows hikers to skip most of the overgrown Amiswki Trail and avoid the most difficult ford of the Amiskwi River. Beginning in Field, the first 25 km of this alternate are on spectacular trail over 3 alpine passes in Yoho National Park: Burgess Pass, Yoho Pass and Kiwetinok Pass. Two national park campgrounds along the way provide convenient layover locations: Yoho Lake and Little Yoho campgrounds. From Kiwetinok Pass, the final 7 km are off trail and involve some scrambling on steep slopes but with saavy route-finding, hikers shouldn’t find the route too difficult. Note that due to the presence of a cornice on the north side of Kiwetinok Gap early in the season, this route is not recommended until after mid-July. See below for a more detailed route description.
These new routes are reflected in the GDTA map and the GDT App.
Howse Floodplain Route Description:
2.8 km north of Howse Pass, ford a tributary of Conway Creek to reach a trail junction (d12). At this junction ignore the old trail to the right and head left/west down the better trail as it follows the north bank of Conway Creek. The evident trail ends on the Conway Creek floodplain about 200 metres before hikers should look to ford to the south side of Conway Creek where the floodplain is open and easy walking. Ford Conway Creek and continue heading west on the floodplain on the south side of the creek toward its confluence with the Howse River. If Conway Creek is in flood and too difficult to cross here, you can stay on the north side of the creek and follow the non-ford alternate route through the forest that will involve a little bushwhacking and route-finding to reach the Howse floodplain.
In 800 metres, reach the Howse River floodplain and ford Conway Creek (again) to the north side. The creek here is braided and shallow which should allow for an easy crossing. From here the Howse floodplain is wide open, easy walking and very scenic. Head north on the east side of the Howse floodplain for about 2 km until you reach a forested outcrop that from a distance appears to block your way but upon closer look is easy to walk through/around. Walk through the less dense trees to the east/right side of the outcrop to return to the open floodplain in 400 metres where you will find an old horse trail. Follow the horse trail north through grassy meadows on a section of the floodplain that hasn’t flooded in years. The horse trail ends in 1.5 km at an old horse camp located on the west side of the trail near the edge of the floodplain. A UFO-looking weather station can be seen a short distance to the east. At the floodplain’s edge, turn sharply right/northeast, sticking to the eastern bank of the Howse River.
In 500 metres the main channel of the Howse River forces hikers into the forest but rather than bushwhacking east to the old trail, ford a small tributary (that offers better water than the silty Howse River) and follow a game trail next to the river, scrambling up a small cliff to avoid the river’s edge. The game trail is strewn with deadfall and brush but is a slightly better option than the overgrown trail. Equestrians should ford the Howse River here rather than taking the game trail. Late in the summer when the river is low, hikers may also be able to ford the river here.
Follow the game trail for 750 metres until the main river channel turns northwest allowing hikers to return to the floodplain. Head NNW staying on the east side of the floodplain. Early in the summer, the Howse River might be in flood making the floodplain difficult or impassable beyond this point; if so hikers should consider using the old trail which is 150 metres bushwhack east of the river’s edge.
Enjoy 1.8 km of scenic walking on the floodplain which is mostly dry with a few shallow fords of minor channels until the main channel of the Howse River flows against a steep cliff on the eastern side of the floodplain forcing hikers into the forest again. Follow a well defined game trail that starts right next to the river at the south end of the cliff. Equestrians should ford the Howse River here rather than taking the game trail. The game trail becomes brushy and less distinct as it heads north on the edge of the cliff overlooking the river. In 300 metres just before the cliff edge veers northeast away from the river, descend a very steep trail down to the floodplain. Back on the floodplain, head north staying on the east side of the floodplain which is mostly dry and easy walking for the next 1.6 km.
When the main channel of the Howse River forces hikers off the floodplain for a third time, follow the old trail which lies just inside the forest at the edge of the river for 1 km. The old trail here is quite overgrown with sections of washed out tread and blowdown, allowing you to contemplate how nice walking on the floodplain is in comparison. The trail briefly heads out onto the open floodplain for about 1 km before darting back into the forest for another tedious 400 metres before the the main river channel moves west allowing hikers to return to the floodplain.
Walking is relatively easy with some route-finding required to navigate around a forested outcrop and boggy terrain as hikers head north on the floodplain. In 2.6 km reach a signed junction with the Glacier Lake Trail (d14), marking the end of the floodplain route and the beginning of maintained trail. Leave the floodplain and return to the trail which improves significantly north of this point, 9.1 km from the Mistaya Canyon trailhead on Highway 93 (d16).
Kiwetinok Alternate Route Description:
The Kiwetinok alternate runs 32 km from the town of Field to where it rejoins the GDT deep in the Amiskwi Valley. This distance is similar to the bypassed portion of the GDT (31.3 km). Each option has its pros and cons, as the regular route runs along a low elevation valley bottom which is largely flat but often overgrown and lacking in alpine scenery, while the Kiwetinok Alternate heads into spectacular alpine on mostly good trail, but also includes much more elevation change and a necessary final 7 km of off-trail route finding involving some scrambling on steep slopes.
Starting in the town of Field, follow a short connector trail to intercept the trail to Burgess Pass (which otherwise starts 500 metres down the highway). This connector trail leaves from the NE corner of the Yoho Trading Post parking lot and almost immediately crosses to the north side of the Trans-Canada Highway. Across the highway, good single-track winds through sparse trees before entering the forest and joining with the Burgess Pass trail after 300 metres.
From the junction with the Burgess Pass trail, turn left to begin a stout 950m climb over 5.8 km to the pass. Once at Burgess Pass (2208m), you will reach a junction where the Burgess Pass Trail descends down the north side to Emerald Lake, but northbound hikers should turn right onto the Wapta Highline Trail which runs a spectacular 6.6 km through the alpine to Yoho Pass.
This Wapta Highline Trail contours along at 2150m, forming a path above treeline and below Mount Field and then Wapta Mountain. Just above the trail on the flanks of Mount Field lies the famous Burgess Shale Walcott fossil quarry, which is emphatically closed to unaccompanied parties and this is enforced with cameras, serious fines for entry and even more serious fines for anyone caught with a stolen fossil. Continue onward as you gently descend 300m to Yoho Pass at 1850m.
At Yoho Pass, another trail rising from Emerald Lake joins on the left so stay right to descend the east side of the pass. Only a few hundred metres after Yoho Pass, you will arrive at Yoho Lake Campground and trail junction. This campground is 12.7 km from the town of Field and makes for a good stop if you’re hiking a shorter day out of town. At this campground, a trail to the right descends to Yoho Valley Road but hikers bound for Kiwetinok should turn left. Over the next 9.5 km you will encounter three more similar junctions, where all of the right forks descend to the Yoho Valley, while all of the left forks lead you towards Kiwetinok Pass.
The first junction is 2.1 km after Yoho Lake (14.8 km from Field). Here, you intercept the Iceline Trail which has climbed steeply up from the Yoho Valley alongside Whisky-Jack Creek. At the junction go left and gently ascend to 2200m as you trek below the terminal moraines of retreating glaciers as the Iceline Trail contours through austere alpine below the high peaks of the Presidents Range. Takakkaw Falls can be seen across the valley to the east; at 384m, the falls are one of the highest in Canada.
After another 3.3 km (18.1 km from Field) you arrive at the second junction. This time the Highline Trail descends to your right down to the Yoho Valley. Stay left and continue past the Emerald Glacier along the Iceline Trail for a further 4.1 km. Soon you begin a gentle descent to 2050m and reach the third junction in the Little Yoho Valley (22.2 km from Field). Here, weary travelers can turn right and walk 300 metres off-route to the Little Yoho Campground and adjacent Stanley Mitchell Hut (if possessing ACC reservations). To continue onward, stay left at this final junction and climb steadily (400m over 3 km) to Kiwetinok Pass at a lofty 2470m, 25 km from Field.
From Kiwetinok Pass only 7 km remain until rejoining the GDT in the Amiskwi Valley. However, the remainder of the route is off trail involving challenging route-finding with significant elevation loss and gain, and thus substantially more rugged than the good trail you have enjoyed up to the pass. Allow several hours.
Your next objective is “Kiwetinok Gap”, which is a modest break in the north wall of the Kiwetinok valley about 3 km away. Rather than contour along the north wall of the valley to the gap (which involves steep sidehilling on often slick vegetation and loose scree) the best route is to descend steeply to the valley bottom until you reach treed terrain at 2050m, 1.7 km from Kiwetinok Pass. At this elevation you can begin to ascend along a forested bench which provides more stable footing. Continue moving west as you climb the forested north wall, aiming to ascend as steeply as you were descending from the pass. After 0.7 km of walking through the trees, you will emerge from the forest at 2180m and intercept a small stream bed which runs down slope from Kiwetinok Gap. Ascend alongside the stream bed as you climb nearly due north for the final half kilometre to Kiwetinok Gap at 2355m.
Once at Kiwetinok Gap you will crest to stunning views of the Amiskwi Valley and peaks beyond. Be aware that a cornice may be present on the north side of Kiwetinok Gap early in the season so this route is not recommended until after mid-July. Use caution as you approach the edge and look to descend around the cornice to one side or the other. If you are too early in the season and the cornice is large, you may have to retrace your steps.
From Kiwetinok Gap the GDT lies about 4 km away including a substantial 730m descent. Previous parties have used a variety of descent routes including following the creek bed, but the best route is likely to stay to the left (west) of a forested mound that lies 500 metres away in the centre of the alpine bowl in front of you. As you descend to the west side of this hill, you will see a forested expanse below you with a narrow ribbon of meadows and loosely spaced trees running through it. Aim to follow this more open terrain as you continue to descend northwest below treeline.
When you have descended 2.1 km in a northwest direction from Kiwetinok Gap to 1900m elevation, the slope becomes noticeably steeper as it descends to the creek a few hundred metres away. While you could continue descending to walk in or alongside the creek, the easiest footing is likely attained by angling more to the west here (to WNW from NNW) such that you move parallel to the creek but staying above the deeper creek valley. A few hundred metres further you will emerge from the forest into a burn zone, where you will be able to see the remaining kilometre of terrain between you and the GDT in the valley bottom. Below you, the GDT runs along the close (east) side of the Amiskwi River and veers even further east towards you after it crosses to the north side of the creek you are following. Thus, you should also cross to the north side of this creek at around 1650m as the creek valley mellows out. Once across the creek, continue NW for a final 600 metres to intercept the old road that the GDT follows. The terrain over the last 1.5 km is an old burn zone with many fallen trees, but it is relatively sparsely vegetated so good route-finding will make for tolerable travel until the GDT is reached about 2 km north of the first ford of the Amiskwi River (d3).